The Story Behind Scratches: Why They Matter and What You’re Really Healing
When you first see a scratch on a carbon fiber part, it often feels like more than just surface damage—it’s a crack in the aesthetic bond you had with the object. A bike fork, a car trim, a drone boom—all these carry identity, purpose, and trust. Repairing carbon fiber is thus an act of restoration, not just correction. (For factory-level context, see our fabrikant van koolstofcomposiet overview and aangepaste composietfabriek capabilities.)
To repair well, you must become a listener—to the material, to the damage, and to your own judgment. Every decision (sanding, filling, polishing) is reversible only up to a point; beyond that, you risk irreversibly exposing fiber, weakening structure, or creating visible halos. (If you’re planning bespoke finishes or repairs, explore our aangepaste koolstofvezel work.)
In this article I’ll not just tell you Wat to do, but also why each choice matters, when to hesitate, and how to think three moves ahead.
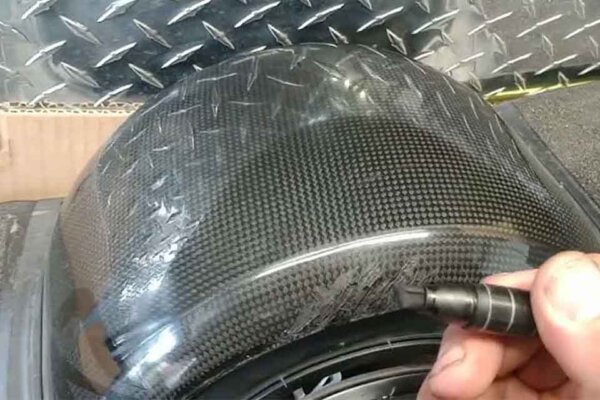
Understanding Damage in Carbon Fiber: The Hidden Layers of Risk
To understand how to fix a scratch, you must first understand what you might niet see.
The Multi-Layer Structure
Most consumer carbon fiber parts (auto, bikes, sporting goods) consist of:
- Carbon fiber reinforcement (woven cloth or unidirectional)
- Epoxy or polymer resin matrix binding the fibers
- Surface resin / gelcoat / surfacing layer to smooth weave
- Clearcoat or UV-protective topcoat for gloss, protection, and weathering
A scratch might cut only through the clearcoat, or may bite into the surface resin, or sever fibers. The deeper you go, the more complex and risky the repair.
Hidden (Subsurface) Damage
Some damage is invisible:
- Delaminatie (layers of fiber/resin separating internally)
- Matrix cracks or microcracks even if fiber appears intact
- Fiber/matrix debonding where the bond between fiber and resin is fractured
Industry best practice guides (e.g. Repair of Fibre Reinforced Polymer Structures) emphasize that many defects are hidden beneath the surface, and effective repair requires that you remove damage before rebuilding.
In some cases, non-destructive testing (ultrasonic, thermography, shearography) may help reveal hidden damage not visible by eye.
Thus your first job is diagnosis: understand how deep the wound goes, and whether it’s purely cosmetic or structural.
Diagnosing the Scratch: Tools, Methods, Warning Signs
Here is a refined approach to diagnosing damage, combining intuition and objective tests.
Visual & Tactile Checks
- Angled lighting & magnification: Use a strong light at grazing incidence and possibly a loupe or magnifying glass to reveal edge inconsistencies, fraying, or whitening beyond the visible scratch line.
- Fingernail edge testing: Very gently drag a fingernail across the scratch. If it “catches,” the damage likely penetrates beyond the clearcoat.
- Tap / coin test: Tap with a coin or small stylus around the area; compare sound tone to healthy area. A hollow or dull sound suggests delamination.
- Wet-sanding color transition (for advanced): while wet sanding a fine area, watch if the sanding slurry starts turning dark (carbon showing) vs just haze (resin / clearcoat). In composite forums this is often used to judge when you’re close to fiber.
If all signs indicate the scratch is confined to the topcoat or shallow resin, you can proceed with more confidence. But if fiber or delamination is in question, treat repair as structural, or consider a specialist.
Choosing the Right Repair Strategy: A Map of Options
Repair isn’t binary; it’s a spectrum. Think of your strategy as a ladder you climb only as far as needed. The farther up you go, the more risk you assume.
Here is a refined decision tree:
- Surface / clearcoat only → polishing, micro-abrasion, re-seal
- Surface resin damage (no fiber exposure) → fill & blend, then polish
- Fiber exposure / weave damage → composite patch, scarfing, rebuild
- Large area or high precision component → possible full re-clearcoat or send to pro
Note: In automotive repair contexts, epoxy resin is standard for composite repairs because it is rigid and bonds well; urethane adhesives are generally too flexible for serious structural repair.
Also, manufacturers’ repair guides often limit what can or should be repaired (versus replaced). Use their guidance when available to avoid unapproved work.
Deep Repair Methods: Principles, Steps & Subtleties
I’ll walk you method by method, including pitfalls, tradeoffs, and “master’s eye” tips.
1. Polishing / Micro-abrasion (Shallow Damage)
Wanneer te gebruiken: The scratch is light, only in the clearcoat, and you see little to no subsurface damage.
Caveats & tips:
- Always start with the minst agressief polish you think might work, rather than jumping with coarse abrasives.
- Use appropriate pads (soft foam, microfiber) and avoid aggressive rotary action over large areas — you risk uneven removal.
- Constantly wipe, inspect, compare with adjacent surface. Over-polishing can cause gloss mismatch or “ghosting.”
- Final finish should be sealed (wax, ceramic spray) to protect the newly exposed surface.
Example from experts: On a Ferrari forum, one user described starting with rubbing compound, then if scratch remains, wet sanding and re-polishing.
2. Controlled Wet-Sanding + Clearcoat Rebuild (Moderate Damage)
Wanneer te gebruiken: The scratch penetrates the clearcoat / surface resin but fiber is not exposed.
Steps with attention to detail:
- Mask heavily — protect edges, adjacent surfaces, delicate geometry.
- Wet-sand progressively: start with 1000 grit, then 1500, 2000, perhaps 3000 — never jump grit too far.
- Keep sanding pressure light; let the abrasive do the work.
- After each grit, clean, inspect, and compare gloss/texture.
- Once flattened, polish out the haze using fine polish, gradually restoring gloss.
- If you’ve removed all clearcoat in spots, apply a compatible clearcoat or surfacing resin (thin, well-matched) to those zones, cure it, then re-sand/polish the transition zone.
- Feather transitions to avoid a sharp “edge ring.”
Watch for feather halos, edge dips, En visible gradients — these are giveaways a repair was done poorly.
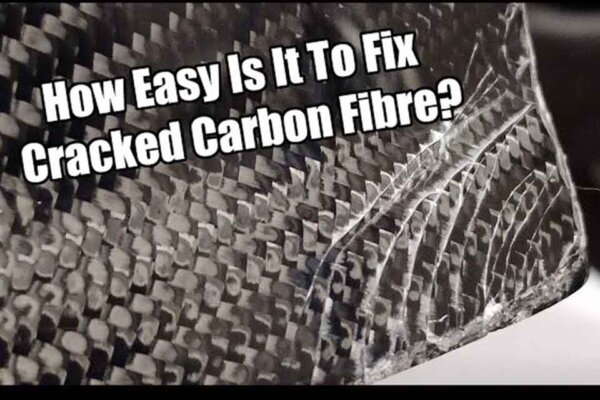
3. Resin / Filler Blends (Shallow Resin Level Damage)
Wanneer te gebruiken: The surface resin was breached but fiber is not yet exposed.
Approach:
- Gebruik een clear epoxy / surfacing resin (UV-stable) appropriate for composite repair. Many DIY forums recommend this.
- For small scratches, mix a resin + a small amount of graphite powder or compatible pigment to match local shade (some community users recommend this).
- Use a syringe or very fine applicator to inject resin into the scratch, slightly overfilling so you can sand flush.
- Use gentle heat (heat gun or infrared) to help bubble release and leveling — but avoid overheating or resin degradation.
- After cure, level by wet sanding and then polish the surface.
- Always extend sanding and blending beyond the repair area to smoothly transition.
Be aware: you must match gloss and refractive index of the repaired resin to surrounding material — otherwise the repair “ghosts” visibly.
4. Composite Patch / Scarf Repair (Fiber / Structural Damage)
Wanneer te gebruiken: the scratch or damage has exposed fibers, severed weave, or you suspect delamination.
Principles to guide you:
- Scarf / taper the edges of the damaged area so that the new patch transitions smoothly into the original. Abrupt edges lead to stress concentrations and visibility.
- Fiber orientation matters: match weave direction, and layer in matching ply angles.
- Compression / consolidation: ideal repairs are done under vacuum bag, or with peel ply, clamps, or tooling to remove voids and excess resin.
- Cure control: temperature, humidity, and time all affect the final strength. Post-cure if needed.
- Flush finishing: carefully sand flush, then apply surfacing resin, clearcoat, polish, and seal.
- Quality inspection: after repair, inspect for voids, delamination, or air bubbles — these are failure points.
In industry, repair standards for FRP composites emphasize removal of all damaged material, overlapping patches, and minimal transitions to maximize structural integrity.
Composite forums discuss methods such as creating epoxy putty with additives (graphite, microfibers, silica) to fill cracks or gaps before layering.
It’s often wiser to entrust complex fiber repairs to professionals who have vacuum, molds, experience, and non-destructive testing equipment.
5. Full Re-Clearcoat or Replacement (When Damage is Extensive)
Sometimes, the scratch area is large or adjacent geometry is too complex to repair invisibly. In those cases:
- Sand entire panel’s clearcoat to remove all old coating
- Re-clearcoat uniformly (spray booth, controlled environment)
- Polish & finish whole area so transitions vanish
- In extreme cases, replace the panel entirely (especially in high-stakes applications)
Master-Level Considerations: What Separates Good Repairs from Exceptional Ones
To outdo your competitors, here are subtleties and principles you can adopt:
1. Edge Blending & Visual Continuity
Even a perfect patch fails if the transitions show a “ghost ring” or gloss mismatch. Skilled repair blends micro-scale variations in reflection, refractive index, and edge softness until the eye can’t pick where repair ends and original begins.
2. Gloss & Refractive Matching
Clearcoats vary in refractive index, thickness, and curing shrinkage. Matching the optical pathway is vital to hide repairs. Sometimes you’ll need to micro-adjust the resin blend or apply a graded clearcoat layer to smooth transition.
3. Thermal / UV Effects
Repair zones can age differently. Use UV-stable topcoats, and consider overcoating the entire surface with a protective layer so the repaired area weathers in sync with the surroundings.
4. Strength & Fatigue Awareness
Aesthetic repairs on shallow scratches might be acceptable, but if there’s fiber-level damage, your repair must consider fatigue cycles, loads, and bonding integrity. A repair done without pressure or consolidation may weaken that spot over time. Composite repair guides repeatedly remind us: structural repairs require pressure, proper cure, clean interfaces.
5. Inspection and Verification
After repair, inspect closely under varied light angles, use touch and finger sweeps, and if possible, non-destructive testing (e.g. acoustic, ultrasound) to pick up hidden voids or delamination zones.
6. Accepting Imperfection & Knowing When to Stop
Even pro shops sometimes leave faint micro-imperfections. The goal is not perfection at all cost, but the best balance of invisibility, strength, and minimal invasiveness. If further action risks exposing fiber or introducing defects, accept a slight visual compromise.
Example Walkthrough: Deep Scratch on a Bike Frame — A Human Narrative
Let me tell you a practical scenario I’ve helped a friend with (compressed into narrative):
Damage: The owner’s carbon bike down tube had a 3 cm scratch after falling partly onto pebbles. Under light, there was a visible “ditch,” and the carbon weave shimmered in one small spot — meaning near-fiber exposure.
Step 1: Diagnosis. We taped around the area, lit it from a low angle, ran a fingernail test, and lightly tapped. The sound was solid, and only a tiny patch had threading. We decided we would do a hybrid repair: part filler plus small patch.
Step 2: Masking & prep. Surrounding surfaces masked heavily. Dust, wax, and contamination removed with solvent and alcohol.
Step 3: Remove damage. Microsanding around the area, we removed loose resin and varnish until the edges of the defect were feathered into stable resin.
Step 4: Fiber patch. We cut a patch of matching weave slightly oversized, saturated it with clear epoxy, laid it in, and used peel ply + light vacuum (vac bag) to press. We cured under controlled temperature.
Step 5: Fill & level. Once cured, we applied a very thin layer of surfacing resin to fill minor low spots, leveled, and cured again.
Step 6: Wet-sand progression. Used 1000 → 1500 → 2000 → 3000 grit wet sanding to flatten the repaired zone, feathering outward.
Step 7: Polish and match. Used fine polishing compound, small circular pad, carefully blending gloss. Inspected under multiple angles until the patch was nearly invisible to the eye.
Step 8: Over-coat & seal. Applied a full clearcoat overlay on the entire side (not just the patch), so that the repaired area ages with the rest, eliminating contrast.
Step 9: Final inspection. Under daylight and angled light, and with touch. Minor micro-ghost remained but was acceptable. The structural integrity was verified by no “gaps” or softness.
This narrative highlights how decisions are made, when you pause, when you escalate, and when you accept a level of “best possible.”
Long-Term Care, Maintenance & Preventive Strategies
A repair is only as good as its subsequent maintenance. To maximize durability and invisibility:
- Gentle cleaning: Use pH-neutral detergents, microfiber cloths. Avoid harsh abrasives or brush pads.
- Protective coatings: Reapply wax, ceramic or U/V sealants periodically, especially in high-exposure zones.
- Visual checks: Every few months, inspect the repair area under angled light to see if micro-crazing, shrinkage, or dust has exposed edges.
- Avoid aggressive impact: If the panel lives in a high-risk environment (rocks, road debris), consider protective film or guards.
- Environmental stress awareness: Heat, UV, humidity all stress resin boundaries over time. A sealed repair weathers more uniformly.
When To Call In a Pro (Not Just a “Better Option” but the Right Choice)
Despite all your care, there are thresholds beyond which DIY is unwise:
- Weave is seriously disrupted or torn.
- Delamination or multiple internal cracks are suspected.
- Part is critical to safety or structure (frame, load-bearing wing, mast).
- Surface is too wide or complex to re-clearcoat cleanly.
- Access to vacuum, proper curing, NDT tools is lacking.
This is especially true for complex, high-load composite structures exposed to water, vibration, and impact — such as carbon fiber electric surfboards.
These products integrate sealed carbon fiber laminates, structural cores, and waterproof resin systems. Even minor surface damage can compromise internal bonding or long-term durability, making professional inspection or factory-level repair the safer choice.
Professional composite repair centers use vacuum/autoclave curing, certified resins, alignment jigs, and advanced inspection to guarantee strength and invisibility.
When you realize you might be “beyond your toolset,” it’s smarter and safer to hand it to experts than risk messing it up further.
Summary & Mindset for Superior Repairs
- Don’t treat scratch repair as mechanistic — it’s diagnostic, adaptive, and reflective.
- Prioritize minimally invasive methods first, then escalate only as needed.
- Edge blending, gloss match, and transition softness are what separates “good enough” from “invisible.”
- Recognize structural vs. cosmetic damage—sometimes strength is more important than perfect looks.
- Use layered inspection, patience, and stepwise progress.
- Know your limits; perfection is the enemy of good when you risk exposing fiber or compounding damage.

